Do these in order: Step 1, then Step 2. A drain does not reset it. The other tabs are not the next step.
4 shots
Start with Gigan
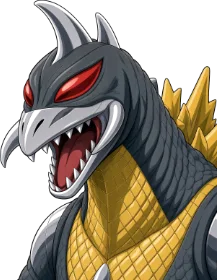
The first four shots of a good game. When they are done, or you skip Gigan, open Step 2 - Big score. Do not open Monsters yet.
Step 1 - Start with Gigan
Those are two different skill shots. A short plunge drops into the right lane. A full plunge you can flip into the upper loop. Mix them. The multiplier goes up, and the ball save lasts longer.
Why this shotTwo different plunges are two different skill shots. Mixing them raises the multiplier and adds ball-save time, so the first drain is less likely to end the ball before you've scored.
Either ramp works the first time. That lights Kaiju Battle at the scoop. Every battle after this one wants the left ramp and the right ramp, one shot each.
Why this shotKaiju Battle is how modes start. Two ramp hits is the cheapest way to light the scoop.
Cradle the ball on the left flipper and shoot the lane just above the flippers. That feed finds the scoop more often than a shot from the right.
Why this shotGigan is the safest first fight, and his ramp shots also damage the building. You score and move Godzilla Multiball closer on the same errand.
Gigan is eight ramp hits. Make the right ramp, ski-pass back to the left flipper, and send it again. A left-right combo pays more, but a miss burns the timer. Try the combo on the last shot, not the first.
Why this shotThe right ramp comes back to the flippers, so eight shots is realistic. Clearing him in one try pays a bigger finish bonus than a combo you miss.
Worth knowing
- Those ramps also crack the building's top floors, so the Godzilla Multiball lock is progressing for free.
- If the left ramp on this machine is a brick, skip Gigan and Megalodon. Godzilla Multiball and Mechagodzilla still score.
Do these in order: Step 1, then Step 2. A drain does not reset it. The other tabs are not the next step.
10 shots
Then the big score
Only after Gigan, or after you skip him. Start Titanosaurus first, then Godzilla Multiball, so the ball save covers the hard shots.
Set it up
After Gigan, the building pays a destruction jackpot and moves the locks forward. Do this before you leave the city.
Why this shotAfter Gigan the building is often one or two hits from a destruction jackpot or a lock. Cash it before you leave the city or that progress sits there.
Scoop to swap cities. London is the usual second city — its perk pumps destruction jackpots. Paris helps the loop. New York helps saucers.
Why this shotLondon makes the building pay more. Paris and New York can wait.
The next battle needs both ramps. Send the left one now, while you still have one ball and a clean cradle.
Why this shotThe next battle will not light until both ramps have been hit. The left one is the miss, so take it from a cradle while you still have one ball.
That second ramp relights Kaiju Battle at the scoop.
Why this shotThat second ramp is what actually lights the scoop. Without it you cannot start Titanosaurus.
Select Titanosaurus. Do not start Godzilla Multiball yet. This mode is clumsy alone and easy when extra balls are crashing around.
Why this shotTitanosaurus is a fixed shot order and easy to drain on one ball. Starting him before the multiball means the ball save covers the hard shots.
You want the ball save wrapped around the rest of Titanosaurus.
Why this shotThe ball save at the start of Godzilla Multiball is the safety net. Extra balls also find the remaining shots for you.
On a ProRamps damage the top floors, building shots damage the lower ones. At 0% integrity, one more building shot starts the 3-ball.
While the multiball is running
While the ball save is still generous, run Titanosaurus. The order is left powerline, center, right. Each shot pays more than the last.
Why this shotEach powerline pays more than the last, and the mode only counts the next one in line. Do them while the ball save is still up.
Fourth shot. It's the stand-up on the far left. Aim it from a cradle when a ball lets you.
Why this shotIt's a tight stand-up. A miss on one ball often drains. During multiball you can afford it.
The captive ball is the last hit. Do it before the ball save gets thin.
Why this shotThis is the victory shot. If the ball save runs out first, the mode can time out and you have to redo the line later.
Lit shots during the multiball are jackpots. Six of them light the super back at the building.
Why this shotJackpots climb as you hit them. Six of them light the super at the building, the biggest collect in the mode.
On a ProAdd-a-ball on Pro: hit the shield targets, then the right spinner.
Worth knowing
- Rodan is double scoring for about a minute. If he's lit, turn him on as this multiball starts — not during a dead ball.
- Heat Ray spots a shot. If a powerline is the only thing left and you can't see it, hold the action button instead of rifling.
- A strong night often starts right here. You do not need the wizard modes to put up a score.
Not the next step. Open a monster only when you are choosing one, or already fighting it.
4 shots
Titanosaurus
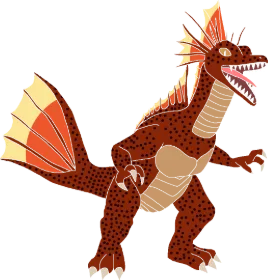
Starting Shots already starts him. Open this only if you are in the fight and forgot the five shots. Do not play him on one ball if you can start Godzilla Multiball first.
Light the battle with the ramps first (both ramps, after your opening battle). Then pick Titanosaurus. Tier-1 battles are timed, about a minute, and progress saves if you time out.
Why this shotYou cannot pick a kaiju until the battle is lit. Progress saves if the timer dies, so starting him still counts even if you don't finish.
Left, center, then right. Don't skip ahead — the mode only cares about the next one in the line.
Why this shotThe mode ignores anything that isn't the next shot. Skipping ahead scores nothing toward the battle.
The far-left stand-up. Settle the ball on a flipper before you go for it.
Why this shotIt's shot four of five. The finish does not pay until this stand-up is done.
Final blow, on the Magna-Grab. This is the shot that makes the mode scary without a ball save.
Why this shotThe Magna-Grab is the victory shot and the one most likely to drain you. That's why the stack plan wraps a ball save around it.
Worth knowing
- The stack plan is the way to play this for score. This card is just the order, for when you're already in it.
- Shield hits during the mode add value to the next shot. Take them if they're staring at you, not as a detour.
Not the next step. Open a monster only when you are choosing one, or already fighting it.
4 shots
Ebirah
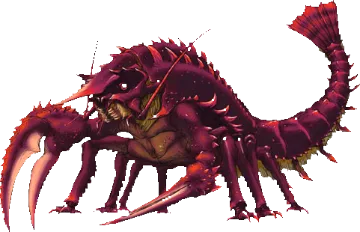
Skip on your first games. Pick him only if the left spinner is a shot you can already hit.
First set. The left spinner is the one that drains people. If you can't ladder it, pick a different kaiju.
Why this shotThe mode will not move on until this spinner has spun enough. If you can't hit it, the whole minute is wasted.
The long set. Rip it. Every spin is also charging Heat Ray, so this mode feeds the tool you'll want later.
Why this shotThis is most of the points, and every spin also fills Heat Ray for later.
Same spinner Mechagodzilla uses. Shorter than the center set.
Why this shotShorter than the center set, same rule. The bumper will not finish the mode until these spins are in.
The saucer bumper is the final blow. It will kick the ball — be done with the mode when you shoot it, not hunting a combo after.
Why this shotThe bumper is the victory shot. Shooting it early just kicks the ball around before the spinners have paid.
Worth knowing
- Completing each spinner pays a chunk, then the bumper pays the finish. You don't have to do them in a pretty order beyond 'enough spins, then the bumper.'
- Good Heat Ray practice. Bad 'I'm on ball 3 and tilted' practice.
Not the next step. Open a monster only when you are choosing one, or already fighting it.
4 shots
Gigan
Same fight as Step 1 - Gigan. Open this only if you forgot the ramp order. It is not a new monster to go find.
First battle of the game: either ramp twice lights this. After that, both ramps.
Why this shotThe first battle only needs two ramps of either kind, so it's the fastest way to get a mode scoring.
Make it, ski-pass to the left flipper, go again. Eight shots. Combos (left then right, or right then left) pay more, but a miss costs the time bonus at the end. Try the combo once, on the finishing shot.
Why this shotIt feeds back to a flipper, so repeating it is the safe way through eight shots. A one-try clear pays a much bigger bonus.
Don't hunt the left ramp off a random feed. If your copy airballs it, pretend this battle is right-ramp-only. You will still win.
Why this shotA random left-ramp miss burns the timer and the finish bonus. The mode does not require this ramp.
Ramp shots damage the upper floors. When Gigan falls, you're often a couple of building hits from a multiball.
Why this shotThose ramps are also building damage. You're qualifying Godzilla Multiball without a separate trip.
Worth knowing
- Halfway through lights an ally even if you don't finish. That's enough reason to start him on ball 1.
- Finish bonus is meaningfully bigger if you clear him in one try. Staying safe is worth more than a fancy combo you miss.
Not the next step. Open a monster only when you are choosing one, or already fighting it.
4 shots
Megalodon
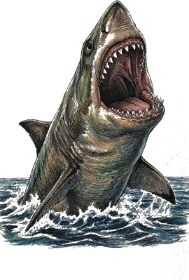
Skip until the right ramp and the loop feel easy. He is a bad first monster. The shot moves, and you chase the light.
Seven shots, in a row, on a timer of about a minute. There is no home lane.
Why this shotSeven hurry-up shots and no safe lane. Only start him when you can already hit most of the table. That's where the big tier-1 score is.
The hurry-up moves around the major shots — loop, ramps, building, spinners. Hit the lit one. Then the next.
Why this shotOnly the lit shot counts. Anything else is a drain risk with no progress.
Players lose this mode by running to a favorite ramp while the insert is somewhere else. Look up, then shoot.
Why this shotThe insert moves. Camping a favorite ramp that isn't lit breaks the chain and the timer.
Shots in a row build a multiplier. Let one expire and that chain breaks. Heat Ray can spot a shot you don't trust.
Why this shotHits in a row build a multiplier. One timeout resets that chain, which is where the score was.
Worth knowing
- Skip this until the right ramp and the loop are boring. It is a bad first battle.
- If the left ramp on this copy is dead, Megalodon will keep asking for it. Pick something else.
Not the next step. Open a monster only when you are choosing one, or already fighting it.
4 shots
Bigger monsters
Ignore these until two early monsters are about halfway done and you have changed cities. They are not the fight after Gigan.
Starting a tier-2 in a city where you still wanted to finish a failed tier-1 can lock that battle away. Finish Titanosaurus first if you timed it out and still want the points.
Why this shotStarting a tier-2 fight in a city can lock an unfinished tier-1 battle, so you can't go back for those points.
Loop, ramps, building, center spinner — three hits each. Same 'follow the light' idea as Megalodon, with a bigger set.
Why this shotSame follow-the-light scoring as Megalodon, but each shot wants three hits. That's the jackpot.
The building offers the choice. Fight keeps building the jackpot and can drain you. Flee banks it. If Rodan's double scoring is about to expire, flee while the 2× is still on.
Why this shotFight keeps the jackpot growing and can drain you. Flee banks what you already built, which matters if Rodan's double scoring is about to end.
Megalodon & Gigan is a 3-ball. Jackpots on the flashing shots, super at the right spinner. Smaller score, much harder to die in. Take it when the game is already messy.
Why this shotThis one is three balls, so a drain doesn't end it. Take the safer score when the game is already messy.
Worth knowing
- Power-ups can add time to tier-1 and tier-2. If you're fishing for Ghidorah, the +timer choice is the one that matters.
- You can reach Planet X by starting city objectives, not by clearing every tier-2. Don't get stuck here.
Godzilla Multiball is already in Starting Shots. The others are for later, when that one is not close.
5 shots
Godzilla Multiball
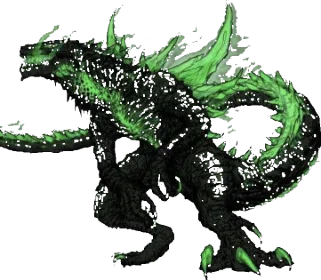
You already start this in Step 2 - Big score. Open this when it is running and you want to know what the lights mean.
Left or right ramp damages the upper floors of the building. This is why a Gigan battle and this multiball are the same errand.
Why this shotBuilding damage is how this multiball qualifies. Ramps hit the top floors, and they're the same shots Gigan already wants.
Watch the window inserts. They are the integrity meter, not decoration.
Why this shotThe lower floors only move when you shoot the building. The window lights are that meter, not decoration.
On a ProTake integrity to 0%, then shoot the building once more to start.
They start modest and climb with every jackpot you score, and with how many times you've started this multiball. The published rulesheet bases it near 500K × starts — trust the insert if a code update moved it.
Why this shotThose arrows are the jackpots. They climb with every one you score and every time you've started this multiball.
Six jackpots light the super at the building. That super is also what qualifies the Monster Zero mini-wizard later, once your power-up level is high enough.
Why this shotSix jackpots light the super. That's the biggest shot in the mode, and it also qualifies Monster Zero later.
During the multiball the shield bank is an add-a-ball, not a distraction.
Why this shotA fourth ball means more jackpots before the mode ends. The shields are how you get it.
On a ProHit the shields, then the right spinner.
Worth knowing
- Start a battle you want finished — Titanosaurus — before this, not after the ball save is gone.
- Anguirus is another add-a-ball: light him at the scoop, then the action button during multiball.
Godzilla Multiball is already in Starting Shots. The others are for later, when that one is not close.
5 shots
Mechagodzilla Multiball
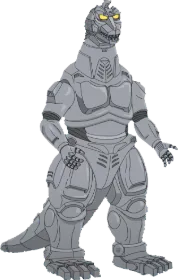
The other big multiball. Play it when Godzilla Multiball is not close. It is not part of the first-game order.
The bar in front of the right spinner runs from green toward red. Keep ripping until he's online.
Why this shotThe spinner charge is the qualify. Nothing else starts him.
After the spinner is charged, the shields get in the way.
Why this shotThe shields are the second gate. On Premium you cannot start until they're down.
On a ProShoot the right spinner again to start. You don't have the full shield dance.
Ramps and the building, then the shield targets, back and forth. Clear the set.
Why this shotThat's the jackpot pattern: ramps and the building, then the shields. Random shots don't pay the same.
After the jackpot set, every spinner adds to the super for a short window. All three count. This is the fun part — rip them.
Why this shotAfter the set, every spinner adds to the super for a short window. That's the burst.
The safe collect is the right spinner. The tail whip from the upper flipper is the bigger multiple. Take the tail only if you can see the shot.
Why this shotThe right spinner cashes the super safely. The tail whip multiplies it harder and is easy to miss, which can waste the collect.
Worth knowing
- His super jackpot is what qualifies Terror of Mechagodzilla later, paired with a high power-up level. You don't need that tonight.
- This multiball stacks with others. If Godzilla Multiball is closer, do that first.
Godzilla Multiball is already in Starting Shots. The others are for later, when that one is not close.
3 shots
Bridge Attack
A side job. Starting it is enough. Do not chase it before Starting Shots.
Switch hits light the magnet. Repeated shots to the captive ball drop the bridge's integrity toward zero.
Why this shotRepeated hits here drop the bridge and light Bridge Out. The magnet and the meter live on this shot.
When a ramp is lit Bridge Out, shoot it. Two-ball multiball. Jackpots are the flashing shots.
Why this shotThat ramp starts the two-ball. The flashing shots during it are the jackpots.
Keep sending it. After a few jackpots they double, and the right ramp becomes a timed super. The first time, that super also adds a ball.
Why this shotAfter a few jackpots they double, and the right ramp becomes a timed super. The first one also adds a ball.
Worth knowing
- This is a city objective. Starting it — you don't have to master it — is one of the four jobs that open Planet X.
- The captive ball is shared with Titanosaurus. If both are close, finish the kaiju during a ball save, then go back to the bridge.
Godzilla Multiball is already in Starting Shots. The others are for later, when that one is not close.
4 shots
Tank Attack
Another side job. Finish it when you are already close. Do not stop Starting Shots for it.
Tanks light on the major shots. About ten of them qualify the scoop. You'll hit several by accident while doing anything else — finish the set on purpose when you're close.
Why this shotAbout ten lit tanks light the scoop. You'll hit some by accident. Finishing the set is what starts the mode.
Same scoop as battles and city select. Make sure Tank Attack is what's lit before you send it, or you'll start something else.
Why this shotThe scoop is the start button. If something else is lit, you'll start that instead and waste the tanks you just shot.
Tanks march toward the captive ball. Shoot them on the way. If they reach Godzilla, the super gets worse.
Why this shotTanks that reach the captive ball shrink the super. Shooting them on the way protects the collect.
Keep the tanks off the captive ball and the Maser Cannon lights the super. Fewer arrivals, bigger collect.
Why this shotKeeping tanks off Godzilla is what lights the Maser super. Fewer arrivals, bigger points.
Worth knowing
- Starting Tank Attack counts as a city objective even if the super gets away from you.
- Two-ball modes are easier to control than Godzilla's three-ball. Fine place to practice cradling one ball and shooting with the other.
Help while you play. If you have to choose, stay on Starting Shots.
4 shots
Heat Ray and allies
Do these in the cracks between shots. If you have to choose, stay on Starting Shots.
The center spinner fills it. Hold the action button on the lockdown bar to spot the lit shots. Use it even when only one insert is on — the points are real, and a full use leads into a super spinner.
Why this shotA full Heat Ray spots a shot you don't trust, like a powerline or a Megalodon hurry-up. Even a partial use still scores.
The right flipper cycles Mothra, Rodan, and Anguirus. The scoop collects whoever is lit. Mothra saves the left outlane. Rodan is about a minute of double scoring — turn him on as a multiball or a big battle is about to pay. Anguirus is an add-a-ball from the action button during multiball.
Why this shotMothra saves a drain. Rodan doubles scoring during the modes that actually pay. Anguirus adds a ball in multiball. The timing is the whole point.
Saucer Attack starts easily. Destroy three saucers and take the extra ball, then leave the bumper alone.
Why this shotThree destroyed saucers is an extra ball. After that the bumper is a drain machine, not a score.
Inlanes spell jet fighters; ten fighters destroyed is an extra ball. Monster Rampage, from letters at the left spinner, pays an extra ball the first time you complete a long run of its moving shot. Both will happen while you play ramps. Notice them. Don't chase them on ball 3.
Why this shotBoth pay an extra ball if you notice them while you're already shooting ramps. Chasing them instead of a battle is how a ball scores nothing.
Worth knowing
- A second tier-1 battle you get through is another extra ball. That's a reason to start Gigan and then Titanosaurus, not to camp one fight.
- Power-ups collect at the scoop once the meter fills. Early on, ball-save help and multiball jackpot boosts beat a random points award.
Help while you play. If you have to choose, stay on Starting Shots.
4 shots
Planet X
The long goal, after many cities. Ignore it for your first several games.
Ramps light it, the scoop starts it. Starting the battle (or finishing another objective) also lights a destruction jackpot and lets you change cities.
Why this shotStarting a battle counts as a city job even if you don't finish it, and it lights a destruction jackpot.
Blue powerline targets, then the center spinner. The spinner builds a value. The blue shots collect it. It can run underneath other things — let it.
Why this shotThe spinner builds a value and the blue shots collect it. It can run under other modes, so ignoring it leaves points sitting there.
Beat the Magna-Grab until a ramp says Bridge Out, then shoot that ramp. Starting the multiball is the objective.
Why this shotStarting Bridge Attack is the city job. You don't have to master the multiball to get credit toward Planet X.
Green tanks, then this scoop. Once a city's four jobs have been started — across however many cities it took — city select offers Planet X. That's the mini-wizard. Victory after it is how you reach the deeper wizard, King of the Monsters.
Why this shotOnce a city's four jobs have been started, city select offers Planet X. That's the path to the mini-wizard, not clearing every kaiju.
Worth knowing
- Changing cities is progress, not a reset you should fear. Each new city has its own kaiju and the same four jobs.
- Destruction jackpots cash out through the upper loop after they count down. Don't leave them sitting there.
- Monster Zero and Terror of Mechagodzilla are optional late modes. They need a super from the matching multiball plus a high power-up level. Learn the stack before you care.
Check the source
Unofficial card. Not affiliated with Stern Pinball or Toho. Shot order follows Stern's published rulesheet and the community rulesheet around code 1.16. Point values move when Stern ships code — trust the inserts on the machine.